This post is the fruit of quite big experience I’ve done to build what mentioned in the title.
The choice of the NGFW is because Stonesoft is the company where I happened to be working for the last decade… actually for the last 12 years 
Since iOS devices have been announced, this question has been more and more recurring… and I even wrote a kind of a HowTo at one point. Which has been extended by a good friend of mine and published on a blog… which does not exist anymore.
The problem is that HowTo was not completely detailed… and it generated lots of questions and comment, to clarify various aspects of the topic.
Hence I’ve decided to avoid that knowledge to go lost, publishing this post on something that I control (well, sort of  ).
).
Enriching it with bit more details and side information.
Still reading? Still wanting to have your iThing connected in VPN with the mighty Stonesoft NGFW? Allrite! Read on!
Let’s start from a basic concept: what is Mobile VPN?
Shortly, it is the ability to build an encrypted tunnel over the internet to allow your iThing to access to one or more protected IP networks, using the bundled Cisco VPN client that these iDevice include.
Mobile VPN can use different protocols, although this article covers IPSec based VPN.
To authenticate the device we’ll use X.509 Digital Certificates, while to identify the user we’ll rely on a strong authentication system based on the great cloud-based service SecurePass by GARL.
Let’s start from the need for Digital Certificates. These are the building blocks we need to implement a machine-to-machine trusted relationship to allow mutual authentication.
Digital Certificates are normally issued by a trusted entity called Certification Authority. There are multiple companies selling digital certificates, such as DigiCert, Verisign, Comodo, etc.
Alternatively, we can create your own CA since the need we have is to build an infrastructure where we can issue the digital certificate at our convenience. There are countless systems to create CA and issue digital certificates for servers and clients, commercial and not.
I’ve found few years ago a very handy free project called XCA and started using it since then. Even if not strictly pertaining to the IPSec VPN, this HowTo includes instruction about how to create your own CA, create digital certificate requests for clients and servers and sign them to create digital certificates as needed.
Once you download and install XCA, you need to create your own certificate database. This is like a container for all the private keys, certificate requests, digital certificates etc related to one specific CA or set of CAs.
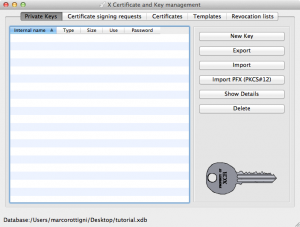
Once you’ve created a new database (File – New Database) and protected with a password, XCA main interface opens as shown below:
The first thing we need to do before creating our CA is to create a private key for it. This is like the most important piece of secret you might want to keep. NOBODY, NEVER whould have your CA Private Key… since this would mean that he would be able to forge certificates on your behalf. And if he’s a bad guy, destroy your credibility and reputation.
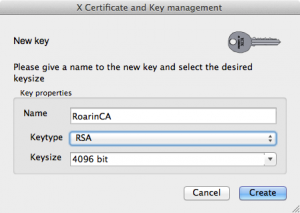
To create a new private key, please click on New Key button and fill in the fields as shown below:
After clicking on Create, you will see the private key appearing in XCA main interface shortly after. Optionally, you can right click on that key and select Change Password if you want to protect this verry important secret with a specific password.
Let’s now create a new CA certificate, which will be the public certificate (signed with our private key) that we’ll give to everyone wanting to verify if a given certificate (e.g. for a client or a server) has been issued from our CA. It is safe to give the public certificate out, since (contrary to the private key) it cannot be used to sign or generate other certificates.
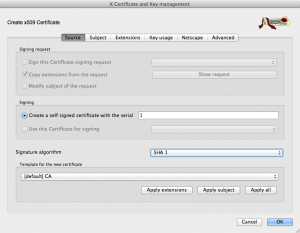
To create a new CA, click on the Certificates tab and then on the New Certificate button. In the window that opens, check that first tab corresponds to what reported below and click Apply All button.
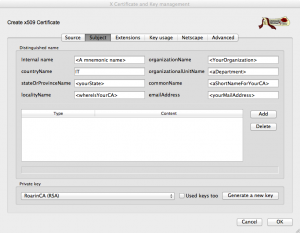
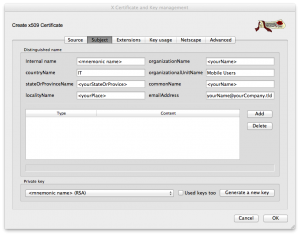
Then, click on second tab (Subject) and fill in the various fields as commented in the image below (replacing the values with your own meaningful ones):
Please note that we’ll use the private key we previously generated to sign this certificate.
Unless you want to add other specific options (which I strongly NOT recommend unless you know very well what you are doing), you can leave the settings in the other tabs as default.
Click on OK to generate the certificate for our CA. If you previously set a password for the CA’s private key, you will be prompted for it now.
Your CA certificate will appear in the list under tab Certificates as shown below:
Should you need to export it in file format to give it to anyone, click on it and select the Export button. Then select the most appropriate format for your situation (normally PEM is widely accepted format).
Once we’re done with our CA, we need to create one digital certificate for our iOS device. While remaining in Certificates tab, click on New Certificate button.
In tab 1, at the bottom of the window, change the Templace for new Certificate to match [Default] HTTPS_client. Click on Apply All. Ensure also that the system is set to sign the certificate using your CA certificate.
Click on Subject tab and fill in the fields with your client data as shown in the example below (again, replace values with your own). At the bottom of the window, click on Generate a new key button since we need another private key for this client certificate. Leave all the rest as default and click OK.
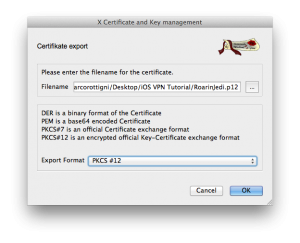
The newly created certificate is now showing below the CA in Certificate tab in XCA. Right click on it and select Export – File, then select the PKCS#12 format. This is a container for client digital certificates containing also the private key. Because the file contains a private key, you will be prompted to protect the file with a password.
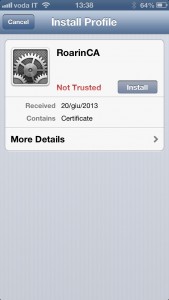
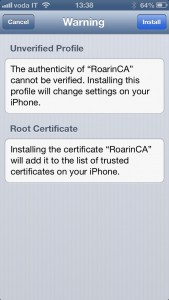
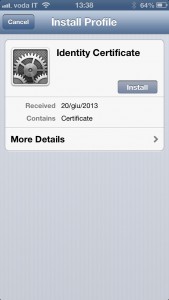
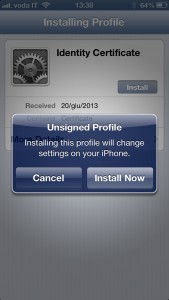
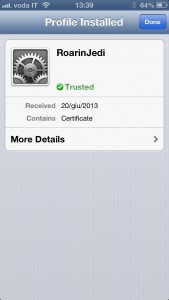
The CA public certificate and the client certificate you just exported can be mailed to your iThing as mail attachments. Once you receive the mail on the iP[hone|od|ad] you can install them simply by tapping on them (first CA, then client certificate). Below I’m reporting the sequence of screens showing the installation on iPhone (I’ve skipped the couple of screenshots where it prompts for code/password). Click to zoom on each.
While we’re at it, let’s complete the configuration of the VPN on our iThing.
From Home screen, tap on General, then on VPN and finally on Add VPN Configuration…
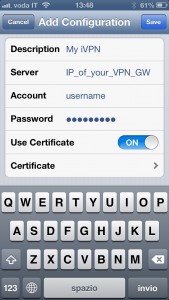
Tap on IPSec and fill in the fields as shown below (replacing data with your own). If you do not know the IP/DNS Name of the VPN Server you need to ask the information to your network security administrator. When you activate Use Certificate option, tap on the Certificate field to select the client certificate you previously imported.
Now we’ll move to the Stonesoft NGFW configuration. Stonesoft NGFW is configured from an external system called Stonesoft Management Center. We’ll perform the configuration using version 5.4.5, and I’ll maybe update this post later when the “just released” 5.5 version will be more widely adopted (should changes be relevant).
In the test setup I’ve made, we’ll grant access through IPSec VPN to network 192.168.35.0/24 to a user. The IPSec VPN will be terminated on the external interface of the Stonesoft NGFW. This user will be authenticated with time-based OATH-compliant one-time password free software token using SecurePass strong authentication system.
If you are interested in getting 2 free accounts forever on SecurePass, you can use the promotional code roarinpenguin when registering online.
Stonesoft NGFW will be configured to assign a Virtual IP to the connecting iThing in a range assigned from a DHCP system on the protected network. We’ll start having a Stonesoft NGFW already configured and operational, to build the VPN gateway role for it and the Mobile VPN.
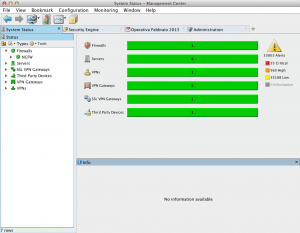
This is the main view of Stonesoft Management Center.
From Configuration menu, select Configuration – VPN.
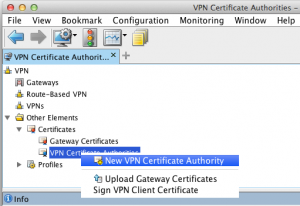
Click on Other Elements to expand it, then on Certificates.
Right click on VPN Certificate Authorities and create a new one.
Give it a mnemonic name in the first tab, click on second tab and the click on Import button. Select the CA public certificate previously exported from XCA.
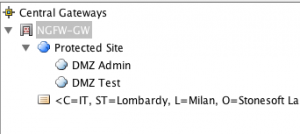
Right click on Gateway, select New ==> Internal Security Gateway. Fill in the details as shown in the window below:
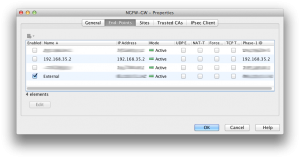
Click on tab End-Points. Enable the public external interface as shown below.
Click on tab Sites. From left side, drag and drop the network and other elements (like hosts, for example) that you want to include in the Protected Site.
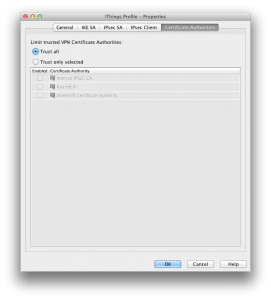
In tab Trusted CA, please ensure that Trust all option is selected.
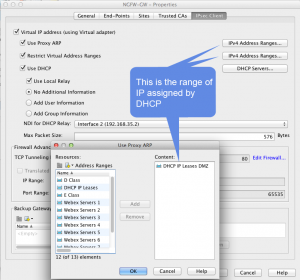
In tab IPSec Client, configure parameters as shown below:
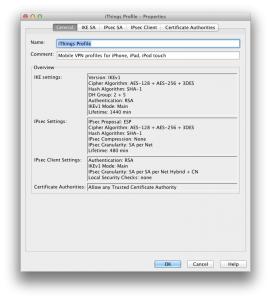
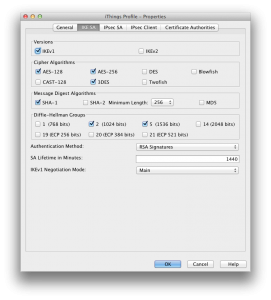
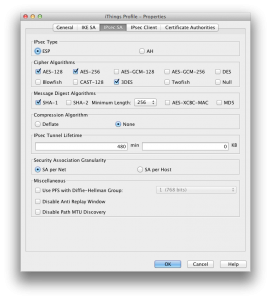
Right click on IPSec Client element in Gateways and assign a Gateway Profile defined as shown in the screenshots below:
Confirm clicking on OK.
Now we have to generate a certificate request on the NGFW VPN Gateway, export it and sign it with our CA, re-import it.
In VPN configuration, on the left-hand side click on VPNs. On the right side, right click on Mobile VPN and select Edit VPN.
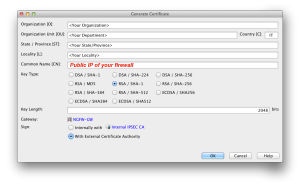
Expand Central Gateways and right click on NGFW-GW. From contextual menu option Tools select Generate Certificate…. Fill in the fields as shown below:
Be careful to insert the Public IP of your firewall in the CN field, since this is what the iDevice will use to validate Server, and to click on the option Sign with External Certificate Authority.
After few seconds, the certificate request will appear below the gateway element on the left side as shown:
Right click on it and select Export Certificate Request… Give it a name and save on disk.
Switch to XCA, open your database if closed and select Certificate Signing Request tab. Click on Import and select the file you just exported.
Right click on the imported CSR and select Sign.
In the windows that opens, check the option Use this Certificate for Signing mapped to your CA as shown below:
Leave any other setting as default and click OK.
Switch to Certificate tab and select the newly created Certificate, then click on Export.
Export it in PEM format, then switch back to Stonesoft Management Center.
Right click again on the Certificate Request of the VPN Gateway, then select Import Certificate…
and select the certificate just exported from XCA. Note that the Certificate Request will be deleted, replaced by the Signed Certificate.
Click on Tunnels to verify that no issues are present.
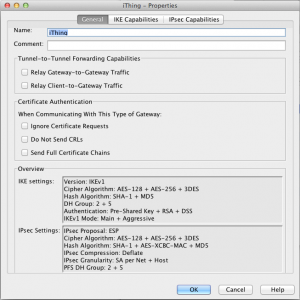
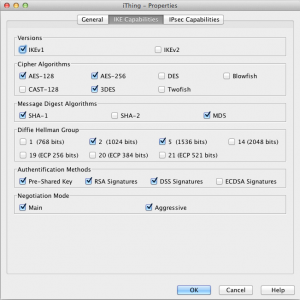
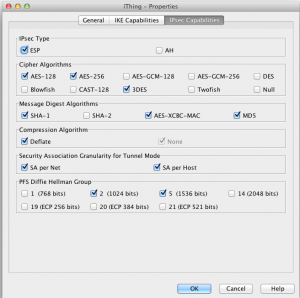
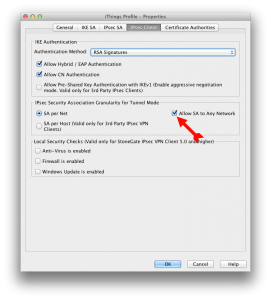
Right click on the VPN profile and select Properties…
Check that tabs match what reported below, with special attention to the setting Allow SA to Any Network in IPSec Client tab:
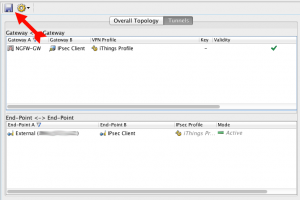
Confirm with OK and click on the Save icon as shown below to confirm the VPN configuration.
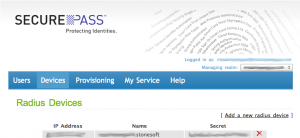
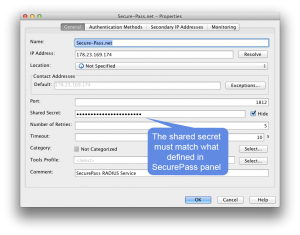
Before creating the traffic Rules, we need to define our VPN Gateway as a Radius Client SecurePass authentication system!
In SecurePass admin panel, add a Device as shown below:
Then switch back to Stonesoft Management Center to define SecurePass as Radius Authentication System.
From menu Configuration – Configuration select Security Engine.
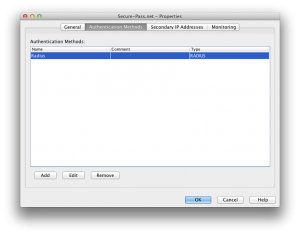
In the left-hand tree structure, locate Servers. Right click and create a new Radius Authentication Server.
Fill in fields as shown below:
Finally, let’s create the needed traffic rules!
Edit your Stonesoft NGFW Security Policy as described below. This part of the HowTo requires a working knowledge of Stonesoft NGFW concepts and configuration techniques. In depth information about it can be found @ Stonesoft Help Website.
First, we need a rule to allow ANY source to send DHCP-related traffic to DHCP Server, bound to an existing Subrule
Then we need a rule to allow Radius traffic from Stonesoft NGFW to the SecurePass Radius system.
Third, we need the rules to enforce Mobile VPN with Strong Authentication provided by Secure-Pass.
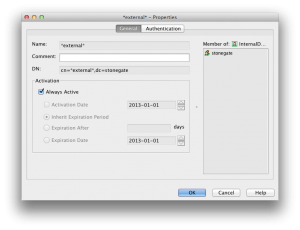
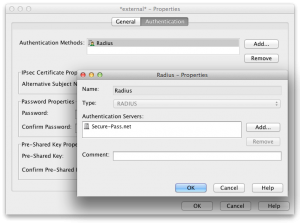
Before doing that, we create a special user in Stonesoft configuration called *external*. Bound to SecurePass Authentication.
When such a user exist in the Authentication cell of a rule, Stonesoft NGFW sends the username-password/OTP pair directly to the backend authentication system without performing any LDAP or other user directory lookup.
The *external* user is defined in Configuration – Configuration – User Authentication as shown below:

The traffic rules to enforce Mobile VPN are shown below (please note how *external* user is referenced)
Publish your Security Policy on Stonesoft NGFW and let’s test!
First, on your iDevice to to Settings – General – VPN and che that the VPN profile you’ve created before is selected.
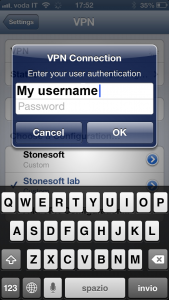
Then activate the switch to enable VPN. Shortly after, it will prompt for username and password.
As username, user your SecurePass account without the realm. For example, if your account on SecurePass is username@mydomain.com you need to use only username as shown below:
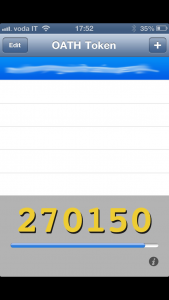
As password, use the password generated by your OTP software token provided by SecurePass.
After a short negotiation, you’ll see the VPN symbol appearing in your iDevice top bar:
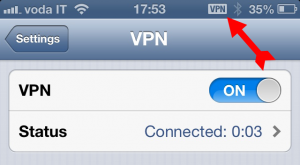
Congratulations! You’ve successfully configured an IPSec VPN between an iDevice and Stonesoft NGFW!
Please share your experience with this post, or if you have any suggestion for improvement, using the comments below.
